Organizing the project environment Organizing the project environment Traditional environments
While putting a project together, students need a way to store information they gather, keep track of their tasks, drafts and deliverables, and maintain minutes of meetings. Traditionally, students would take notes as they research, and use binders and duotangs to store the information. They would scribble out meeting minutes and spend time later typing and printing them, then adding them to the binder. Depending on how the team collaborates, they may make copies of their notes for each other, or one person may have the responsibility of keeping the notes, which could pose a problem if that student is absent at any time.
 The FirstClass environment The FirstClass environmentWith FirstClass, students can manage these tasks much more easily. Students can manage task details within a project calendar, store drafts and deliverables in subconferences, and automatically save minutes from online meetings to a text file, annotating them as needed.
FirstClass eliminates the need to keep everything on paper, and saves time and trees by eliminating printing and photocopying.
Furthermore, FirstClass centralizes everything in a location that students can easily access from any computer with an Internet connection. Multiple students can access the same information at the same time and communicate with each other easily through instant messaging or conferences. If a student is absent, they can still access the material from home and share it with their team members online.
Your project environmentNow it is time to create your project environment. The way you structure this environment is dependent on a number of factors, such as grade level, amount of responsibility you will give students, project expectations, and so on. By now you have already answered these initial questions, so let's get more details.
Understanding conferences
Before you start creating conferences, it is important that you understand the basics of conferences. Go to Your tools to help you understand the purpose of conferences, calendars, documents, and so on.
Then familiarize yourself with some key documents in the client help before you get started. They will help you understand how to assign permissions to secure your conferences, how to put conferences on students' Desktops, how to use mail rules, and so on.
Conference considerations
Once you understand the basics of conferences, you can begin to think about how you would like to structure your students' project environments. Before you begin, you need to consider some factors in the planning process:
 Is the assignment an individual project or a group project? If individual, will students have their own project environments, will you have a project environment you manage yourself, or will there only be one global environment to display final work?Will you create the environments for group projects, or allow students to design their own? If you allow students to design their own, how much flexibility will they have? Can they customize the backgrounds and icons, choose the types of conferences they will use, and so on, or will you set standards or guidelines?Will students require calendars in their environments? What are the important dates they need to record? Keep in mind that calendars aren't used solely to record dates - they are also excellent task managers.Who will administer the environments? You? The team leader?What sort of timeline will be placed on these environments? How long will the environments exist past the due date of the project? Is the assignment an individual project or a group project? If individual, will students have their own project environments, will you have a project environment you manage yourself, or will there only be one global environment to display final work?Will you create the environments for group projects, or allow students to design their own? If you allow students to design their own, how much flexibility will they have? Can they customize the backgrounds and icons, choose the types of conferences they will use, and so on, or will you set standards or guidelines?Will students require calendars in their environments? What are the important dates they need to record? Keep in mind that calendars aren't used solely to record dates - they are also excellent task managers.Who will administer the environments? You? The team leader?What sort of timeline will be placed on these environments? How long will the environments exist past the due date of the project?Once these decisions have been made, you can start to create the project structure, or guide students to create their own project structures.
STEP 1: Design your environment
By now you likely have an idea of how you would like to structure your project environment. We recommend you chart your environment before you start. This reduces the chance for errors and you can see it from a global perspective. Here are two sample charts based on different scenarios.
Example 1
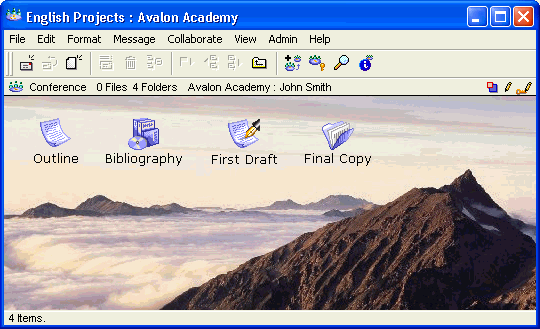
In this chart, the teacher manages a projects conference where students submit different phases of their work. It is a simple project conference with four subconferences.
 Example 2
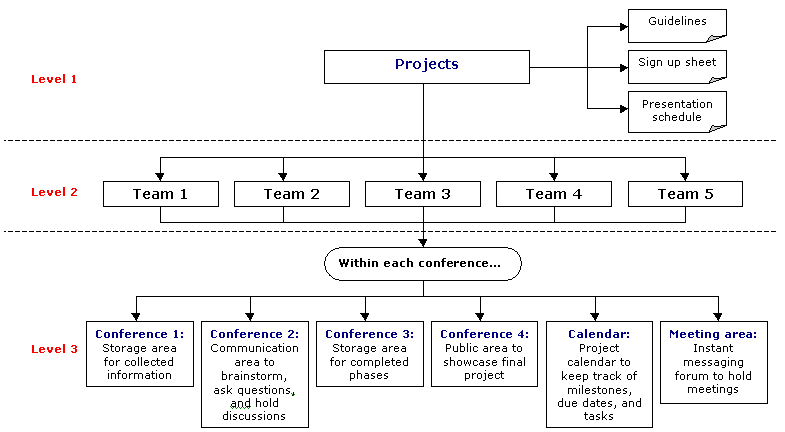
In this chart, students create their own project conferences, but the teacher decides what types of conferences they require. This ensures that students meet requirements, but gives them some control over background and style.
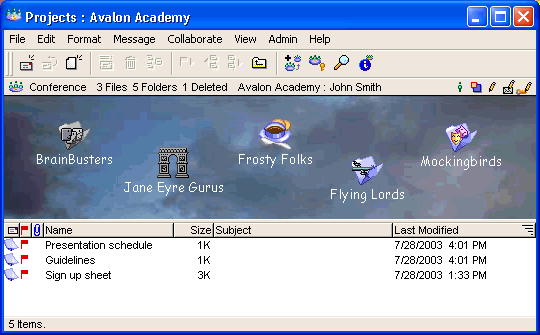
Within the main conference called Projects, there are three documents that outline the project guidelines, the teams and their projects, and the presentation schedule. Within the Projects conference the teacher creates a conference for each team based on their project name. Within each of those conferences the students can create their own subconferences that meet the criteria laid out in this chart.
 STEP 2: Create your environment
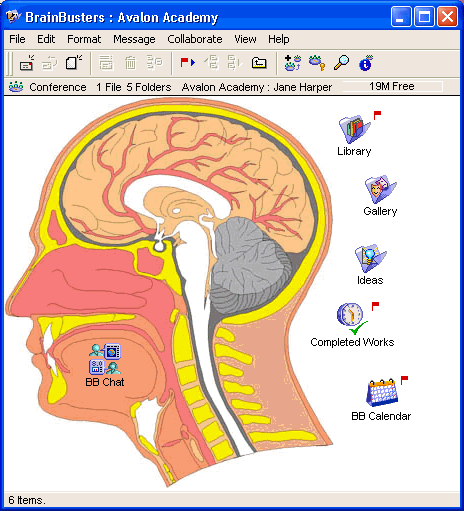
Once you have your structure planned out, it is time to create the conferences. Let's see how the examples above will look once they are created.
Example 1
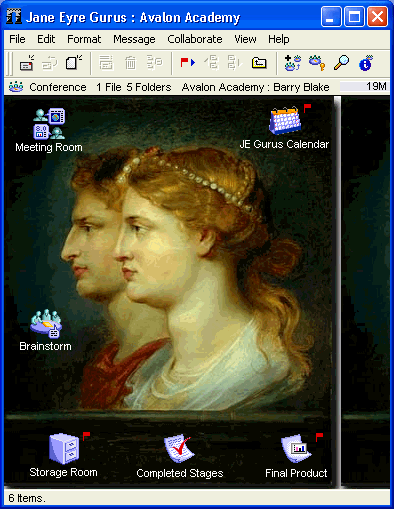
 Example 2
This is the main projects conference.
  STEP 3: Secure your environment
Once you have created your conferences, you need to decide who will have access to them and how much access they will have. Let's see how a teacher secures the above conferences he just created.
Example 1
In this conference, the teacher doesn't want students seeing each others' work, so he gives students Send access only to each subconference.
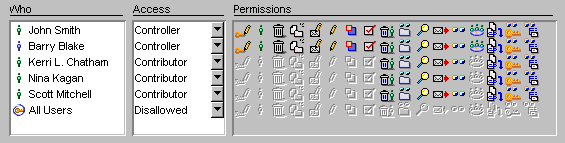
 Example 2
In this conference, the teacher wants to maintain control over the subconferences, so he gives himself Controller permissions. Furthermore, he gives the team leader Controller permissions so he can create subconferences and modify the view.
 STEP 4: Share your environment
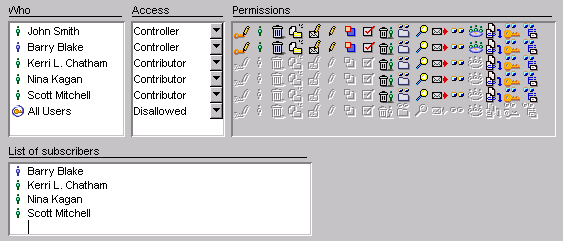
The final step in creating a conference is to share it with others. The easiest way to do this is to subscribe users. In Example 2 above, the teacher subscribes the team members to their respective conferences.
 The next step The next stepSo, you've created your project environment. Now it's time to put your students to work. The next step is for students to start their projects. They will hold meetings, brainstorm and discuss ideas, collect and store information, manage tasks, and schedule their milestones.
You may have decided, based on the grade level, that students need more teacher direction. If this is the case, you may take a more active part in some of these tasks. If you have planned an individual project, not all of these tasks will be necessary, but you will make these decisions based on your own criteria. | ||