 Starting a new class Starting a new classTask list The traditional classroom
The traditional delivery system for education is a classroom setting with a teacher giving a lesson, and students listening, writing notes, and asking questions. Teachers also use this setting to generate discussions and manage the distribution and submission of assignments and tests.
 FirstClass ED is an online classroom FirstClass ED is an online classroomFirstClass ED facilitates classroom instruction by providing an easier way to
• submit, mark, and return assignments
• post questions for discussion and monitor student participation
• give students responsibility for their own work by posting due dates in a class calendar that students are responsible for monitoring
• maintain a list of student marks.
FirstClass ED also complements your class lessons with online resources. From any computer with an Internet connection, you can
• manage multiple classes
• put your lesson plan online and make it available to students as you are ready
• provide additional resources for students who wish to work ahead, do extra credit work, or require further assistance.
When you start FirstClass ED for the first time, you are greeted with a blank "classroom". This classroom is where you will lay the foundation for the coming semester. From this classroom, you can manage all of the classes you are teaching for the current semester.
If you are starting with a blank slate, you will need to create all of your classes. You should only need to do this once, though. You will also need to create a new class if the class has not been taught before.
To create a new class:
1 Open My Classes.
2 Click New Class.
3 Select a course (choose Blank Course if the course is not in the list).
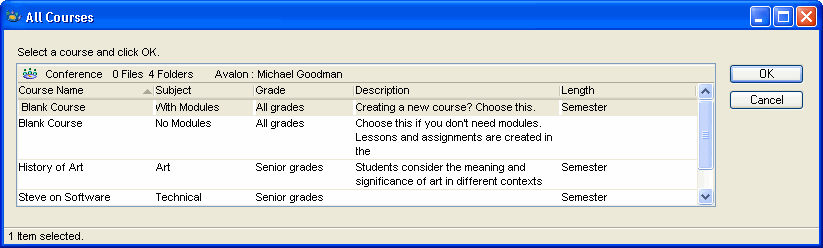 4 Enter the name of the new class. 5 Click OK.
Using an existing class
If the class has been taught before using FirstClass ED, simply add the existing container to your My Classes area. You need only to make modifications this time, as the course contains all of your previously used materials. If you are taking over this class from another teacher, the previous teacher's course materials are already available.
The longer FirstClass ED is running in a school, the more courses will be completed and available to teachers.
Co-teaching a class
If you and another teacher are both teaching the same class, one teacher must create or add the class to the My Classes area, and then add the other teacher and set their Role to Teacher.
If you are the teacher adding the other teacher:
1 From the roster, click Add Person.
2 Select the second teacher from the Directory and click OK.
3 Double-click the teacher's name in the list and set their Role to Teacher.
Both you and the teacher with whom you are co-teaching will have the same class in your My Classes area, with the same information. You can both access and modify the course and materials from the same conference.
Searching for information
In the My Classes area, you may find some search templates in the left pane. Use these to perform a search for the indicated objects. These work with one click and the list they provide is editable.
In this example, you can perform a search for all calendar dates you have booked for the month, or all of your new Inbox items for your classes.
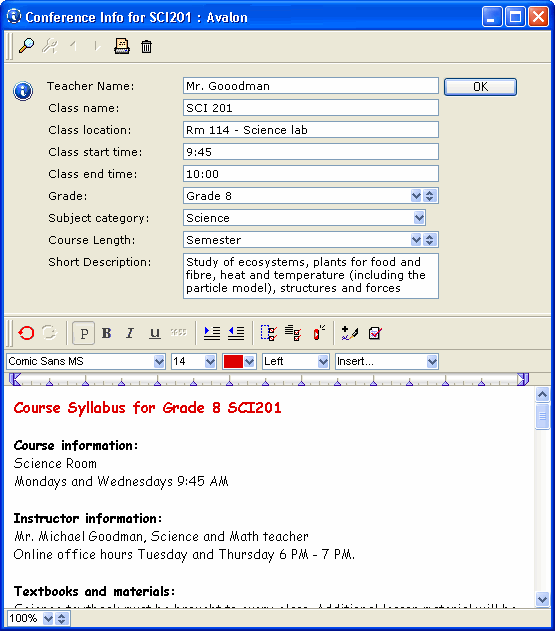
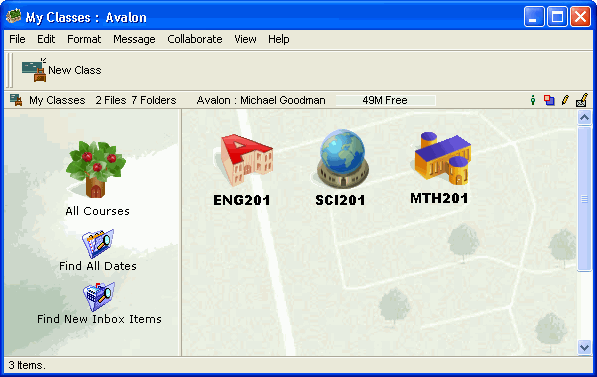 To perform your own search, choose Edit > Find and specify the Search criteria on the Find form. If you save the search it will be added to the left pane. Every class has a Class Information form. You may be required to update some of this information at the beginning of the semester.
To update class information:
1 Open the desired class.
2 Click Class Info.
3 Update any required fields and add content to the body if necessary or desired.
 Note
If you can't edit the fields, click on either the left or right window pane and then click Class Info again.
 Posting to The Board
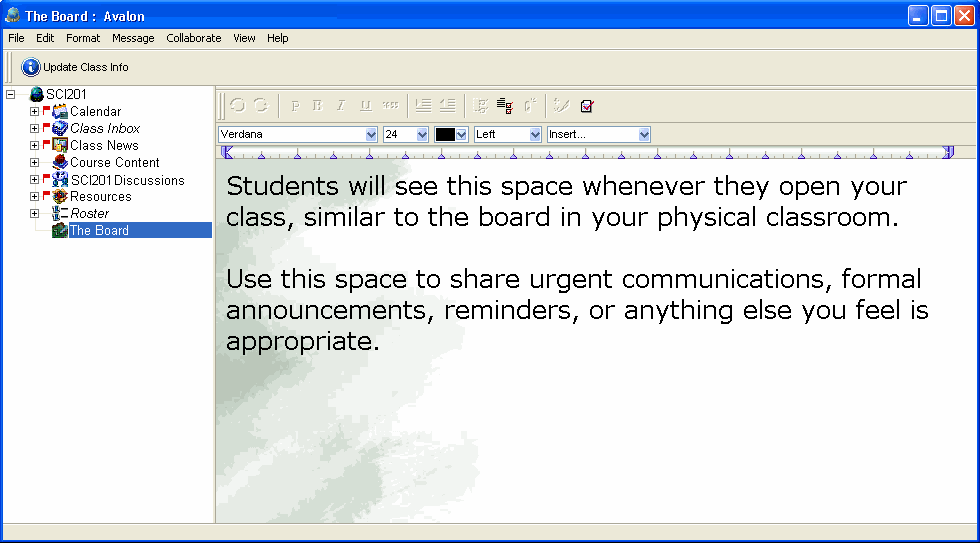
The Board is your and your students' initial view of your online class, similar to the white board or chalk board in your physical classroom. Use this space to post urgent messages, formal announcements, or anything else you feel is appropriate.
To edit content on The Board:
1 Open the class.
2 Start typing in the space, or highlight the existing text and replace it.
 | ||