|
Traditional environments
While putting a project together, the team needs a way to store information they gather, keep track of their tasks, drafts and deliverables, and maintain minutes of meetings. Traditionally, a team would take notes as they research, and use binders and folders to store the information. They would scribble out meeting minutes and spend time later typing and printing them, then adding them to the folder. Depending on how the team collaborates, they may make copies of their notes for each other, or one person may have the responsibility of keeping the notes, which could pose a problem if that person is absent from a meeting at any time.
 The FirstClass environment The FirstClass environmentWith FirstClass, team members can manage these tasks much more easily. Team members can manage task details within a project calendar, store drafts and deliverables in subconferences, and automatically save minutes from online meetings to a text file, annotating them as needed. FirstClass eliminates the need to keep everything on paper, and saves time and trees by eliminating printing and photocopying. Furthermore, FirstClass centralizes everything in a location that members can easily access from any computer with an Internet connection. Multiple people can access the same information at the same time and communicate with each other easily through instant messaging or conferences. If a team member is absent from a meeting, they can still access the material from another location and share it with
their team members online.
Your project environmentNow it is time to create your project environment. The way you structure this environment is dependent on a number of factors, such as number of projects you have to manage, level of detail you require, project expectations, and so on. By now you have already answered these initial questions, so let's get more details.
Understanding conferences
Before you start creating conferences, it is important that you understand the basics of conferences. Go to Your tools to help you understand the purpose of conferences, calendars, documents, and so on.
Then familiarize yourself with the tutorials in the More information section before you get started. They will help you understand how to assign permissions to secure your conferences, how to put conferences on peers' Desktops (subscribing users), and so on.
Conference considerations
Once you understand the basics of conferences, you can begin to think about how you would like to structure your project environment. Before you begin, you need to consider some factors in the planning process:
 Is this an individual project or a group project? Will you create the environment, or does the administrator create all conferences? If the administrator creates all conferences, do you have any flexibility in deciding how it will be structured? Can you customize the backgrounds and icons?Will you require a calendar in your environment? What are the important dates you need to record? Keep in mind that calendars aren't used solely to record dates - they are also excellent task managers.What sort of timeline will be placed on this environment? How long will the environment exist past the due date of the project? Is this an individual project or a group project? Will you create the environment, or does the administrator create all conferences? If the administrator creates all conferences, do you have any flexibility in deciding how it will be structured? Can you customize the backgrounds and icons?Will you require a calendar in your environment? What are the important dates you need to record? Keep in mind that calendars aren't used solely to record dates - they are also excellent task managers.What sort of timeline will be placed on this environment? How long will the environment exist past the due date of the project?Once these decisions have been made, you can start to create the project structure.
STEP 1: Design your environment
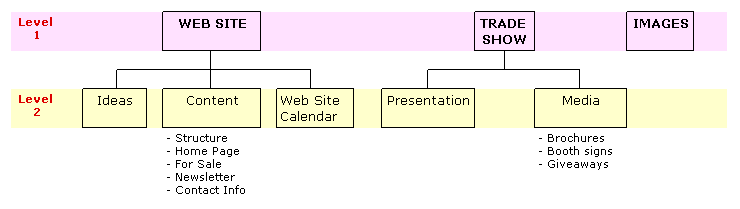
By now you likely have an idea of how you would like to structure your project environment. We recommend you chart your environment before you start. This reduces the chance for errors and you can see it from a global perspective.
Here are two examples of different project scenarios.
Example 1
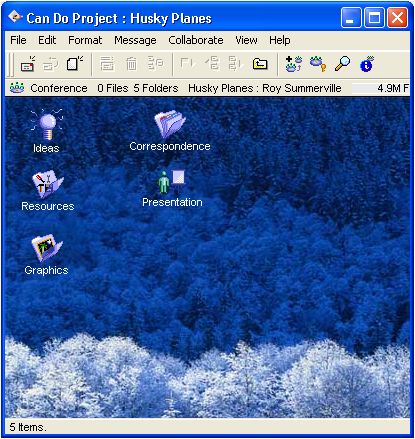
A Sales Representative, Roy Summerville, is responsible for a couple of large sales at a time. He considers each sale a new project, and creates a conference for the different components of his major project.
Within the main conference, called Can Do Project, there are five containers to store the various components of the project. This conference will be shared with other members of the project team.
 Example 2
A Marketing Manager, Michael Green, is responsible for creating a new web site and planning a trade show. He creates a conference for each project. Information that is shared between projects, such as graphics, is put in a separate container, and he lists documents underneath the respective containers. He will share these conferences with his Marketing employees by aliasing the conferences to the Marketing Area.
 STEP 2: Create your environment
Once you have your structure planned out, it is time to create the conferences. Let's see how the examples above will look once they are created.
Example 1
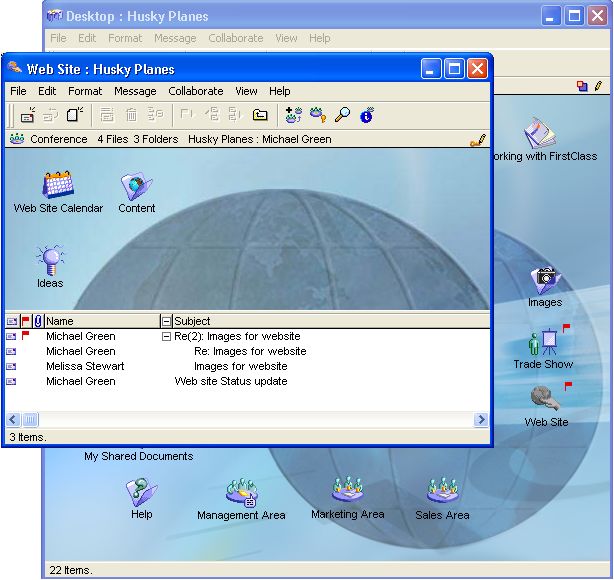
This example shows the Desktop (where the original conferences are stored) and the Web Site project conference.
 This example shows the Trade Show project conference and the Media folder. 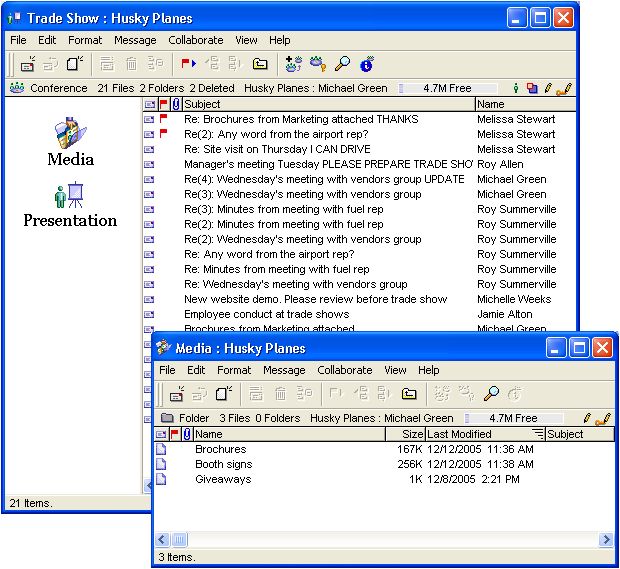 This example shows the Website project conference and the Content folder. 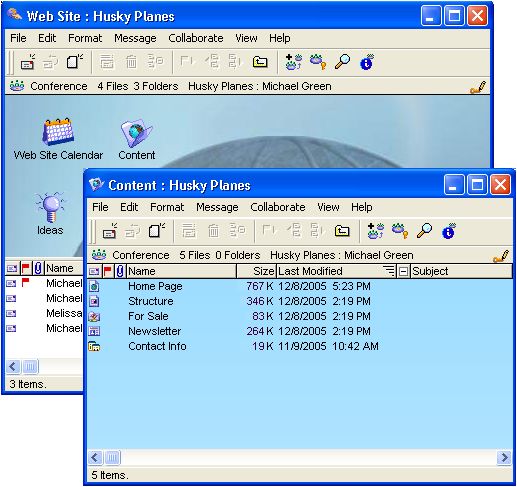 STEP 3: Secure your environment
Once you have created your conferences, you need to decide who will have access to them and how much access they will have. Let's see how the users described above will permission their respective conferences.
Example 1
Roy protects his conference so he and his team members are the only users who have access.
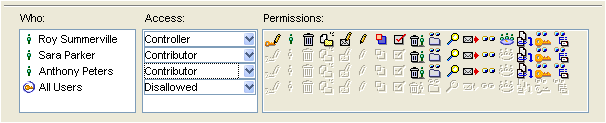 Example 2 Michael protects each conference so only he and his employees can open and contribute to them. He places the conference in the Marketing conference so he doesn't have to subscribe users individually.
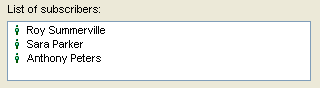
 STEP 4: Share your environment The final step in creating a conference is to share it with others. The easiest way to do this is to subscribe users. Another method is to alias the conference into another conference. In Example 1 above, Roy subscribes his team members to the Can Do Project conference.
 The next step The next stepSo, you've created your project environment. Now it's time to put your conference to work. The next step is to work on your projects. You may hold meetings, brainstorm and discuss ideas, collect and store information, manage tasks, and schedule milestones.
| ||