Developing your lesson plan Developing your lesson planTask list Traditional course development
Traditionally, you may use existing teacher guides to help you prepare your lesson plans for each semester. The guides outline the material to cover, questions to ask, handouts and support material to provide, and so on. However, these guides are usually paper-based and often difficult to drag around from home to school. Further, in order to share your teacher guides or lesson plan with other teachers, you may be handing them your original notes, or you may have to reprint a large number of documents.
 FirstClass ED is a lesson plan manager FirstClass ED is a lesson plan managerA lesson plan helps you prepare for instruction, provides a tool to give that instruction, and documents course content. FirstClass ED accomplishes these goals, and continues to support you in using pre-existing lesson plans. Furthermore, it lets you share your plans with each other by putting your lesson plans online.
Creating your lesson plan
You create a lesson plan by adding modules, lessons, and assignments to Course Content. Course Content consists of a container for each module, where the lessons and assignments for each module are stored in the respective module container.
To create a new module:
1 Open Course Content.
2 Click Create Module.
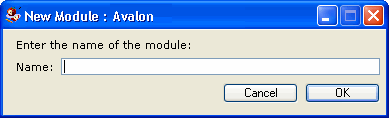
3 Assign a name to the module when prompted, and then click OK.
 4 Choose the type of module you wish to create and click OK. 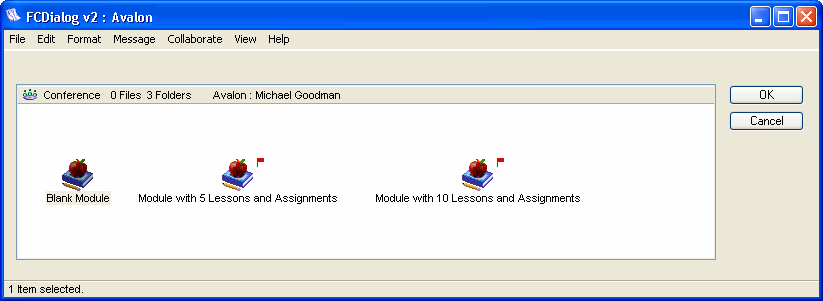 Each module you create is immediately published to students by default. However the content of each module is not published until you manually publish each one. If you prefer that students not see each module you create right away, you will have to hide the module. To hide a module:
1 Open Course Content.
2 Highlight the desired module.
3 Click Hide Module.
Adding lessons/assignments to a module
You can add content to a module at any time. If the course already has content you can simply review content and update it as required.
To add lessons or assignments:
1 Open Course Content.
2 Open the desired module container.
3 Click Create Lesson or Create Assignment.
4 Choose the type of lesson/assignment you wish to create and click OK.
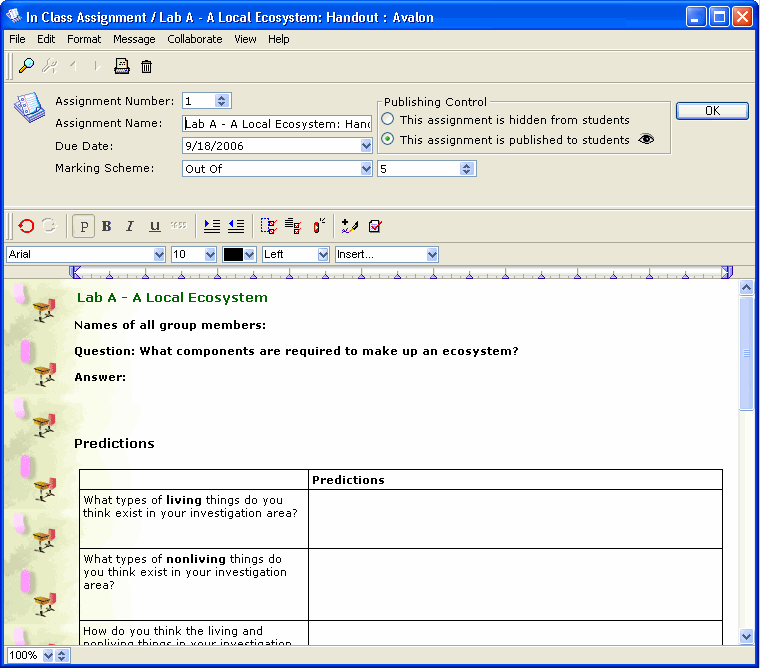
5 Open the new lesson/assignment and complete the envelope field.
The Publishing Control field is only visible to you. Once an assignment has been submitted, you will also see a Mark field.
 Caution CautionEvery assignment number must be unique. FirstClass ED may fail to work properly if you duplicate assignment numbers. However, you can have duplicate lesson numbers.
This example shows a lab assignment for a Grade 8 Science class.
Creating drafts of a lesson/assignment
As the teacher, you have full control over these lessons and assignments. Until you publish them, you can make changes and modify each one as much as you like. The ability to control when students see the content enables you to maintain a draft for each lesson and assignment.
Publishing a lesson/assignment
The ability to publish a lesson or assignment enables you to control the flow of information to your students. When you publish a lesson or assignment, it is immediately visible to students in their Course Content view.
To publish/unpublish a lesson or assignment, open the assignment and choose the corresponding radio button in the envelope field of the lesson or assignment.
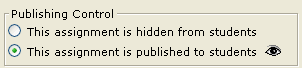  Shortcut ShortcutClick the Published field (
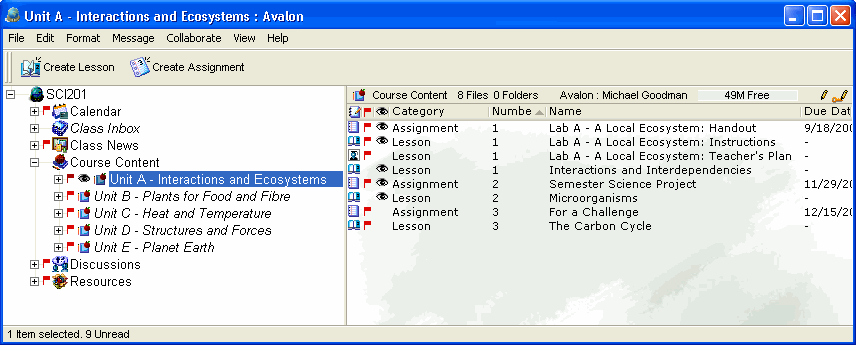
 ) directly on the pane for the corresponding lesson/assignment. ) directly on the pane for the corresponding lesson/assignment.In this example, the course is Grade 8 Science. Course Content includes five modules, but only one is visible to students. The Interactions and Ecosystems module has been populated with three lessons, one Science project, and a lab with three components: the instructions (lesson), the assignment that will be completed (assignment), and the teacher's guideline (lesson), which will not be published.
 | ||