[Image:81903_22607_2.png]Book resources for a presentation Minimum version: FirstClass 8.3 Audience: Business professionals Experience: [Image:9203_22631_1.png] FirstClass applications used: [Image:9203_24337_3.png][ fcp://@fc.onlinehelp.com,%237600229/En/OnlineHelp/Client Help/Calendars ]Calendars [Image:9203_31709_1.png] Summary Looking for a simple way to organize the location and resources you need for your presentation? Consider using a FirstClass calendar. Instead of sending out printed memos and filling out request forms, you can use a group calendar in FirstClass to invite participants, reserve multimedia resources, and book locations. Here is a comparison of the conventional way you may book resources and how you would do it in FirstClass. [Image:92203_31828_0.png] [Image:9203_31709_1.png] Example Michael Green is vice president of Sales and Marketing at Husky Planes. Several times a year he showcases the company's newest products for his sales staff. His presentations usually consist of a promotional videotape from the Marketing department accompanied by a slide presentation. Michael schedules the presentation, invites members of the sales department, and books the boardroom and multimedia resources all at the same time. He doesn't have to leave his office to ensure that his presentation goes off without a hitch. Here are the steps he takes to handle the arrangements: STEP 1: Schedule presentation Michael schedules the presentation in the Sales Dept Calendar by creating a new event entitled New Product Promo. This is the new event he created. [Image:8102006_91145_0.png] STEP 2: Reserve venue Each resource or location Michael wishes to book has its own calendar. When he schedules an event, he simply enters the name of the resource calendar or location calendar on the Scheduling tab of the event he is booking. If there is a time conflict, it will show immediately and he can decide how to handle it. Michael reserves the company's mid-sized boardroom using the Scheduling tab. STEP 3: Reserve resources Michael also reserves a large screen television, a video cassette recorder, and a video projector. This is the Scheduling tab where he books the resources. [Image:882006_33623_2.png] When he entered his requests on the Resources tab for the New Products Promo event, a new event appeared in each item's calendar. Husky Planes' IT department monitors the resource and location calendars and ensures that requested equipment is ready for use when scheduled. This is the calendar for the video projector that John booked. [Image:882006_32721_0.png] STEP 4: Invite participants Michael invites the members of the sales department by entering their names on the Scheduling tab. From this screen, he sees who may have a time conflict. He adjusts the date and time as needed (the booked times for the resources and locations will also change automatically). The presentation will then appear in each of their personal calendars. This is the Scheduling tab where he invites participants. [Image:882006_33910_4.png] [Image:9203_31709_1.png] Variation If Michael has content he wishes to share before the presentation, he can attach it to the calendar event at the time of scheduling or type it in the text box on the event form. This is the event he created. He attached a file for review and included an agenda in the text area. [Image:882006_32224_4.png]
   
LC4028
 
 
Home  •  Help  •  W0  •  Client help  •  Mail  •  LC4028
If your computer is connected to a microphone, you can use FirstClass to record a spoken message, or any other sound, and attach this recording to a message as an MP3 file.
81203_42521_14.png        Notes
You can also attach existing MP3, AIFF and WAV files, and Mac OS resource files with system 7 SND resources. WAV and AIFF files can contain many audio formats, such as PCM, ADPCM, IMA-ADPCM, MULaw, A-LAW, and so on. In addition, you can embed sound files in content.
Depending on your preferences, attached sound files may play automatically when you open an unread message.
To use your microphone to attach a recording to a message:
1       Choose Edit > Insert > Insert Voice with the message open.
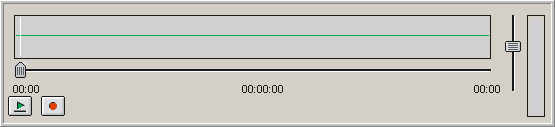
A voice player pane is added to the message envelope.
2182004_41008_0.png

This button
Does this
2182004_41330_1.png
Records.
2182004_41440_2.png
Stops the recording and attaches the sound file.
2182004_41533_3.png
Plays the recording.
2182004_41606_4.png
Stops playback.
2182004_41642_5.png
Controls the volume.
http://website.marvel.co.jp/__Help/FOV2-0000F3E0/Client%20help/Mail/0000F34B-007EA7C8.0/6192006_35404_0?src=.PNG
Positions the voice player.

2       
Click Record.
3       Use your microphone to record your message or sound.
4       Click the stop recording button when you are finished recording.
A sound file is attached to the message envelope.
To review the recording, click the play button.
To change the recording, delete the attachment and click Record again. You can also attach an additional recording by clicking Record again.